Showing posts with label Color Inspiration. Show all posts

Monday, February 8, 2010

No Botox Required!

We are in the process of giving some of our patterns a little face lift. This is by no means an "Extreme Makeover"! Our first volunteer is the Sampler Tote. Here is the "after" picture (a.k.a. our new "look"). It's the same Sampler Tote pattern with a fresh new look - no botox required! The Sampler Tote offers many options - use up your test blocks (any 6" block will do - you don't have to use the blocks in the pattern), practice your free morion quilting, test out a color combination that you've been curious about. The possibilities are endless!
Keep on quilting! -Kris

Tuesday, October 13, 2009

Meet our girl Friday or the Friday Bag!

It's NEW! It's comfortable! Best of all - it's quick!

It will be ready for you on November 1st...let me introduce you to the Friday Bag!

Here is a new bag that is relaxed enough for Friday, but sophisticated enough for a walk in your urban jungle. The fabric here is called "Garden Party" - it's a riot of spring color - it is now being offered by Blank Quilting. the fabric is designed by textile designer Yolanda Fundora. Kits will be available on Yolanda's website for the versions shown here!!

With this bag, you have options! You can quilt the panels, you can make it reversible, you can embellish or piece. The choice is yours!

Feature your lastest fabric find! Coming soon...more options with our girl Friday!

Until then, have fun with your sewing machine - go on, give it a hug!)
-Kris

Friday, September 4, 2009

Color from a Sketchbook - Part 1

The mornings are brisk here in NH, but the days still warm up nicely. I think a last day at the beach is in order! I am packing a Bongo Bag and a Crafty Tote done in Sketchbook Teal Blue by Blank Quilting, designed by Yolanda Fundora.

I have to admit: Blue is never my first choice. However, this collection made a believer out of me! This is an analogous color scheme, using blues/green inspired by nature.

My personal favorite of the Teal Blue colorway is the Arabesque Turquoise. It's a timeless floral - perfect for a bag, front porch quilt, or a wearable!

The lime paisley really makes this collection pop - it is also a very versatile fabric. It can be paired with so many fabrics in my stash- I would bet you'd find it a good addition to your collection.

Stay tuned for more Sew and Go Totes done up in Sketchbook!
-Kris

Tuesday, July 28, 2009

Color Theory


Contemplating your preferences...

As a quilter, I am always thinking about color and it's never-ending combinations. I found a great website called Worqx (dedicated to web design, actually) which has an interesting tutorial on Color Theory. Even though this tutorial contains references to html, the ideas are applicable to our art! I found that am attracted to split complementary color combinations. Take your time with the tutorial to discover your preferences and what other possibilities you may be missing! And..don't forget to try out Peter Piper's Pallet Picker!

Happy quilting! -Kris

Thursday, July 16, 2009

Tidal Totes by the Sea

I heard from Kathy Stanley of Sew Maine yesterday. She owns two lovely shops in Maine, one in Portland (Sew Portland) and Trenton (Sewing by the Sea). We chatted for a few minutes about the Tidal Totes pattern; she and a group of 8 other women ventured to Lily's Cafe in Stonington, Maine and enjoyed a day of sewing and eating. (Now that's a perfect day!)

Click here to read Kathy's blog and see her beautiful embroidered Tidal Tote. You will also be inspired by all of the color choices. Check it out!

Keep quilting!
-Kris

Thursday, April 16, 2009

Auditioning Quilts, Part 2

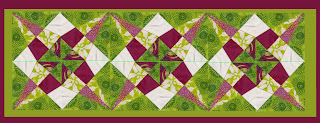
Back again! We were working on a simulated table runner from the last post and now I'd like to take a look at this design using some Photoshop Elements filters - this gives me a different design perspective. Here is the original:
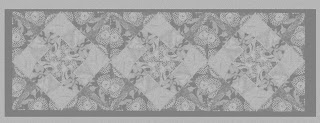
Let's take a look at this design without color. Click on Filter>Sketch>Chalk and Charcoal. I increased the Charcoal setting to 10 and decreased the Chalk setting to 2 and here is what appeared:I think the squares on point really show up above; I can use that in choosing another color scheme. Next, I used the Filter>Pixellate>Crystallize. I set the cell size to 40 and the results below illustrate the spinning effect of the block.
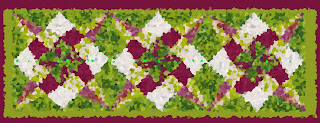
Last, just for fun I used the Filter>Stylize>Glowing Edges and increased edge width to 3. I think this just looks cool!
What can you do with one block and Photoshop? Try it!
Sunday, April 12, 2009

Auditioning Quilts on Your Computer, Part 1

I use Photoshop Elements to view/organize photos. I also use it to audition quilts.
Photoshop Elements is the poor cousin of full blown Photoshop, however it has enough features to let you do some creative maniputlation of your photographs and scans. Here are the steps I used to audition my paper pieced block from Friday's post to audition a possible table runner on my computer:


  1. Sew one block. (Only one! Yeah!)
  2. Scan block into computer at 100 ppi.
  3. Open this scanned image using Photoshop Elements. Use the Full Edit menu.

  4. If your image needs to be rotated slightly, cleick on Image>Rotate>Custom - then rotate one degree at a time to ensure that the bottom of the block is parallel to bottom of screen.

  5. Crop the image to eliminate seam allowances - click on the crop tool and adjust the block as required.

  6. Adjust the "canvas size" to the size of the project you'd like to audition. Fore example, the block from Friday's post is 6 inches square. I would like to try a table runner that is 6 blocks by 2 blocks, so I am going to need a canvas size of 36" x 12" - at this point I am not including borders. So click on Image>Resize>Canvas Size>adjust to the desired size.

  7. To see the entire field of your design, , click on View>Fit on Screen.

  8. Click on the Marquee tool and highlight your block; go to Edit>Copy Merged; then click Edit>Paste. This will place an identical block on top of your existing block (on a new layer). You can now select this with the Move tool and move it to where you want it to go.

  9. Continue to paste in blocks as you need them. Isolate and rotate blocks by turning off layers then use the Marquee tool to select the block that you need to rotate. Click on Image>Rotate>Selection...as needed.

  10. You can merge blocks together into units as needed. Click on the layers that you want to merge as a unit. Right click in the Layers area and choose Merge Layers and you will create a unit.

  11. Select and copy units as in step 8 above.

  12. Adjust the canvas size to create borders.

  13. Create a border as follows: click on Layer>New Fill Layer>Solid Color. The color will automatically fill in with the foreground color. You can change this by cicking on it and selecting new colors.

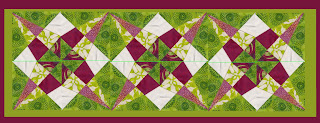
  14. If you'd like to add another border, you can also add rectangles and color them. Here is my project:

In the next post, we'll explore some effects you can apply in Photoshop Elements to analyze your project.

Friday, April 10, 2009

Back to Color


Wednesday, we had color inspiration from Caroline's Star Path quilt. Here is my interpretationof her color use. I chose to paper piece a block, which I'd like to explore with different settings.


Tomorrow, I'll show you how I've used Photoshop Elements to simulate quilts on my computer screen.


Happy quilting! -Kris

Wednesday, April 8, 2009

Color Inspiration - Pink and Green


Is it cheating to get color inspiration from a quilt? If it is, so be it! Don't you just love the bright pinks and greens? Maybe it's the time of the year! What can you come up with using these colors as inspiration?
This is a Star Path Quilt made by a Stitched in Stone (prolific!) quilter Caroline. She changed the pattern by using a single solid light background instead of blending 4 backgrounds. This has really made the stars pop!
I hope you'll bookmark this as an inspiration for a spring project! (Stay tuned - I will post my pink and green doodle on Friday!)
Keep quilting! -Kris

Wednesday, April 1, 2009

Quilting Stars (and Lobsters, too!)

I had the pleasure to teach at Stitched in Stone in Kingston NH on Tuesday nights during the month of March - a fun class! The students made Tidal Totes and we sure had a lot of laughs along the way! I have to show you their totes, because they really are beautiful:Clockwise from left, we have Nancy, with her starfish tote - she used the batiks with fairy frost; the fairy frost gave the bag a water effect! Next, we have Cindy - she added quilted pockets on the inside of the bag - that's a great improvement to the bag! Caroline with the gorgeous royal blue starfish tote is next, she's donating her bag to charity. Last but not least, we have Linda, with her beautifully quilted lobster! Linda has already been asked to make more by her coworkers.

Thanks ladies for a great class!


There is such a kind community of quilters at Stitched in Stone - carefully cultivated by Tammy Rommel! If you have a chance, stop by and say "hi" to Tammy and Glenn.

Monday, March 30, 2009

Inspiration and Results!


Last Monday's post contained a "color inspiration" photo of a Gerbera Daisy. Well - here are the results! This is just a doodle that I made using fabrics in my that represented the colors in the daisy. I used 505 spray on the back of the fabrics that I layered on a piece of Peltex. Then I just "doodled" with variegated thread. It's a coaster for my tea!


I think this is an outstanding way to practice your free motion quilting - do a small piece. Don't try to free motion on a big quilt if you haven't had some practice - you can do it! Give this a try!

This would have been a postcard except that I cut it about 5" square - it needs to be 4" x 6" to be a postcard. Here is a great site with information on fabric postcards here: http://www.sewfunpatterns.com/fabricpostcards.html
Have fun!

-Kris